
by Martha Bishop, trimmed in Van Dyke points.
Today it's more commonly known as prairie
points or saw tooth trim, but it's been around
a long time. Van Dyke point trim can be
done several ways, I call this a "double point".
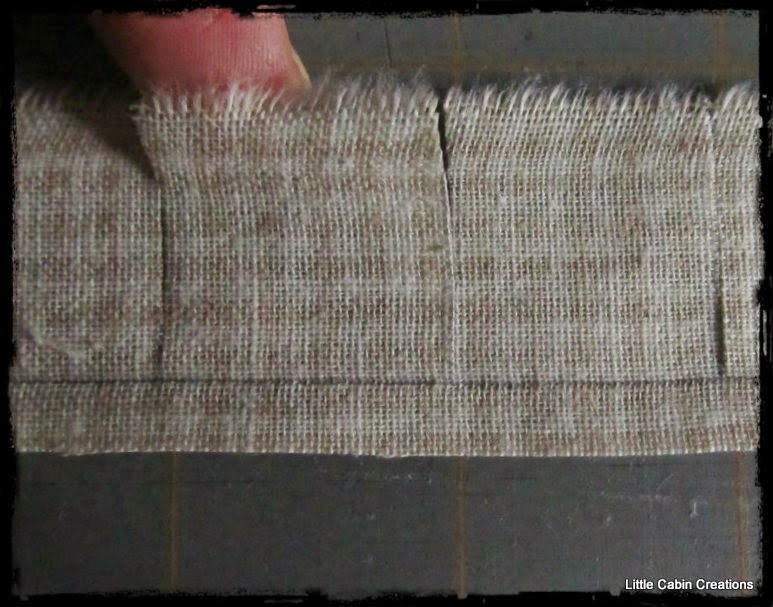
I thought you might like to see how I made it.

This is a 3 inch wide strip, long enough to
go around the edge of my apron body.
(In my case about 23 inches.)
go around the edge of my apron body.
(In my case about 23 inches.)

I folded it in half & ironed a sharp crease.
(Wrong side is on the inside of the fold,
I'm using a reproduction homespun that
looks the same on both sides)
(Wrong side is on the inside of the fold,
I'm using a reproduction homespun that
looks the same on both sides)

Opened it up.

With my pencil I marked 1 & 1/2 inch increments
along the bottom half section.
(Mark on the wrong side of fabric)
(Mark on the wrong side of fabric)

On the top section, I started marking
the 1 & 1/2 inch increments halfway
between the ones on the bottom.
(note the 2 black dots)

This is how it looked when all the marks
were done.

I then cut each line, just to the crease.
As you see below, the little sections
are squares.
are squares.
This is the one rule that must
be followed.
I started with a 3 inch strip, folded it in
half. That makes it 1 & 1/2 inches wide.
My sections are 1 & 1/2 inches.......a square.
So, you can make this trim any width you
want, tiny for a trim, big for a quilt,
just make sure the sections are square!
just make sure the sections are square!

I started by folding the first square on the
top row, to the left, forming a triangle.
(Ignore that first little half section).
I finger pressed it.

Next, I folded the section to the
right,

making the first complete triangle.

I pinned it in place.

I moved to the next square and repeated.


The top row is all folded and pinned.

I pressed all the triangles.

~~~~~~~~~~~~~~~~~~
FYI
At this point you've actually made a single
continuous Van Dyke trim.

For example,
use a 1 inch ribbon, make 1 inch squares,
just don't cut all the way to the edge. (Ribbon
that has a finished edge is best). For fabric, cut the
width about 1/4 inch wider than needed. Mark
the correct width along strip with a pencil and cut
your squares to the mark. That way your trim stays
together while you work with it.

~~~~~~~~~~~~~~~~~~~
Next is the bottom row.
I folded the first square up and to the
left forming a triangle.
FYI
At this point you've actually made a single
continuous Van Dyke trim.
For example,
use a 1 inch ribbon, make 1 inch squares,
just don't cut all the way to the edge. (Ribbon
that has a finished edge is best). For fabric, cut the
width about 1/4 inch wider than needed. Mark
the correct width along strip with a pencil and cut
your squares to the mark. That way your trim stays
together while you work with it.
~~~~~~~~~~~~~~~~~~~
Next is the bottom row.
I folded the first square up and to the
left forming a triangle.

Finger pressed.

Folded it to the right, making
the first complete triangle.

Time to deal with that odd little
piece we ignored!
I folded the odd piece over to the right
I folded the odd piece over to the right
& trimmed it off.

Pinned it together.

Then folded the triangle up, even with the
first triangle on the top row & pinned it.
first triangle on the top row & pinned it.

Repeated with the second square
on the bottom row.
on the bottom row.


Till they were all done.

I pressed the triangles.

I'm using homespun fabric that's heavy
for making this type of trim in a small size.
To reduce bulk, I opened up each square,
for making this type of trim in a small size.
To reduce bulk, I opened up each square,

and trimmed the inner triangle.

These are the five pieces for the apron.

I pinned the trim in place, right sides &
raw edges together.
raw edges together.

Basted it down.

I checked the right side to make sure
all the folds were in place.

This narrow strip will become the hem.
I checked the right side to make sure
all the folds were in place.
This narrow strip will become the hem.

I folded under 1/4 inch toward the wrong
side & pressed.
side & pressed.

Placed it on top of the basted trim with
right sides and raw edges together.

Here, I have folded it back so you can
see how it looked inside.

Basted in place.

I sewed it with a back stitch,
removed the basting stitches
and trimmed the seams.

I folded it toward the back side and
whip stitched the hem down.

This dolly needs a work apron,
she's very messy with the flour when
she bakes. So, the waistband needs to
go all the way to her sides for a
side swipe apron.

I used 2 basting rows for gathering.

This is the waistband with 4 pressed folds.
The top row will be the stitching line
for attaching to the body of the apron.
The 2 apron ties will be attached on
the side edges. Note the 2 black dots.
(I just figured out how to write on my
photos......what fun!)

Right sides and raw edges together
& stitching done.
& stitching done.

Below you can see where the finished
ties are attached. Here is a link to
making tie ends with a point.
Ties For An Apron
Make sure both ties will be to the right
side when the waistband is folded toward the
back. You can see where I made a fold in the
ties, as they are wider than the waistband.
ties are attached. Here is a link to
making tie ends with a point.
Ties For An Apron
Make sure both ties will be to the right
side when the waistband is folded toward the
back. You can see where I made a fold in the
ties, as they are wider than the waistband.

Fold the waistband to the back side.

To reduce bulk, I removed the top
1/2 triangle and trimmed away as
much fabric as possible.
To reduce bulk, I removed the top
1/2 triangle and trimmed away as
much fabric as possible.


The back side sewn down.

Finished!
Van Dyke trim can look prim or very fancy
depending on the choice of fabric or
ribbon & it's sew easy to make.
Give it a try!
~~~~~~~~~~~~~~~~~~~
This is a post on the history of
Van Dyke Points.
Jane Austen's World-Van Dyke Points In Regency Fashion
See some of Martha's rag dolls here:
Martha's Dolls-Rag Dolls
depending on the choice of fabric or
ribbon & it's sew easy to make.
Give it a try!
~~~~~~~~~~~~~~~~~~~
This is a post on the history of
Van Dyke Points.
Jane Austen's World-Van Dyke Points In Regency Fashion
See some of Martha's rag dolls here:
Martha's Dolls-Rag Dolls
Very nice work, especially on the thicker fabric! This would be a nice trim for an adult apron too. You do great tutorials!
ReplyDeleteThat is so cool! I did not know how to make points like that!
ReplyDeleteThank you for your tutorials. I always learn something new.
"Sew" glad to see this post. I remember a dress my mom made for me (way back when...) with this trim, and have often wondered how it was made. (Nice day in the Ozarks. Cooler. Yay!)
ReplyDeleteThis was something I never would have figured out how to do. It is very pretty and so fine. The apron is to nice to use making anything with flour. HaHa Your painted head rag doll will be dressed up for sure. You do such beautiful work, I am proud the doll I made is yours to get these fine clothes.
ReplyDeleteOMG this is so cool thanks for sharing!
ReplyDeleteI've always wondered how that was done! So this is where I pester you about the book, again. :~D
ReplyDeleteWow that was amazing! You always do such meticulous work. I've never tried doing this type of apron using the Van Dyke style trim. It sure doesn't look easy.
ReplyDeleteThis is the cutest ever! Thank you for such a wonderful tutorial......makes me feel like I might be able to make a trim like this.
ReplyDelete