Showing posts with label Stuffed Animals. Show all posts

Saturday, February 21, 2015

Bonnie Belle Bufkins

I told this little Bufkin bunny she was certainly
a bonnie southern belle, so the name has stuck.

 Bonnie Belle will look lovely walking the
bunny trails in search of the wild carrots &
mushrooms that grow down by the Swan Creek.
No doubt she will certainly be the prettiest belle
 attending the first garden party of spring.
(I'm so ready for spring!)

It was nice to feel cotton in my fingers again.
Bufkin bunnies love big buttons.
(Actually, they are 1/2 in. in size.)
Her sundress is sewn together & is not removable.

 Standing Bonnie Belle is 14 inches tall
to the tip of her ears.  These photos were taken
with her sitting on a small jar, as she cannot
stand alone, unless you balance her
perfectly & hold your tongue just right!
 
 Mrs. Bufkins was made with the same
greenish wool fabric.  Her photo shows
the color of the wool more accurately.
I have added Bonnie Belle to my for sale page.
~~~~~~~~~~~~~
We've had lots of snow and cold weather
this past week, hope it's warmer in your neck
 of the woods.
HAPPY SEWING!

Sunday, February 8, 2015

An Ozark Hills Bufkins Bunny

I've finished a little green wool (she looks
 gray in the photos) Bufkin bunny.
Seated, she's 11 inches to the tip of her ears.
 She's hand sewn & has glass German eyes.  
Her inner ears and paw pads are a soft greenish
 suede.  Her head, arms & legs are jointed.

She still needs some shading
around her eyes and nose.
Like the bunnies in my yard, she's
all arms and legs.
She does look sweet in her
Southern Belle radish bonnet.

In keeping with the Southern Belle theme,
I've chosen an authentic Civil War reproduction
 called Party of Twelve, for her sundress.  It makes
me think of Twelve Oaks, the beautiful plantation
 owned by the Wilkes family in Gone With The Wind.
I love the deep green & red, with the soft 
blue accents.  These cadmium red 
glass early 1900's buttons will look nice.
My camera isn't picking up the true 
wool color, but it looks more like this 
doctored photo.  She really is a green rabbit.
~~~~~~~~~~~~~~~
Happy Sewing!

Friday, August 16, 2013

Little Foot The Bear

Meet Little Foot.
He's 7 inches tall, hand sewn from 
mohair, with soft ultra suede paw pads.
He has glass eyes, an embroidered face 
& he's 5 way jointed.  He and his 
forest green vintage milliners ribbon
 have been aged. 
I finished this bear several weeks ago,
 but just couldn't come up with a name......!
~~~~~~~~~~~~~
I have added him to my "For Sale Page".

Friday, July 19, 2013

Polka Dots & Pachyderms

Polka dots and pachyderms just seem to go
together........

 This little pachyderm just had to have
a dress & matching bow hand sewn from
 a reproduction 1930's cotton polka dot print.

Her fur is a lovely butter color viscose.
She's 8 1/2 inches tall, 5 way jointed & has
black glass eyes. She's been aged to perfection. 
The vintage buttons on the back
reminded me of big dots, the one's
in front match her dress.

Her favorite game is Tiddlywinks.
Her favorite song is "Polka Dots & Moonbeams"
  and she loves to dance the Polka.
Of course, her name is..................
 "Dottie"
~~~~~~~~~~~~
Just for fun.
Learn about the history of the polka dot in fashion at:
Lady Jojos Blogspot Polka-Dot-Fever 1865-to-1950's

I've added Dottie to my "For Sale" page.

HAPPY SEWING!

Friday, July 12, 2013

Rufus The Bear

This past week I was busy working
 on a little bear I've dubbed Rufus.
  He's just a smidgen over 7 inches 
tall when seated.  
He's hand sewn from a very soft
 faux fur.  His eyes are antique 
amber glass and his vintage ribbon
is a deep wine.
This pattern was designed by
Anna Tysmbal, a Russian bear
designer. I love his simple,
traditional old world look.
Rufus is 5 way jointed.  His
head droops a bit to one side.
Rufus has been aged to show 
love and care.  He's weighted
with steel shot, but his tummy
stuffing is a bit sparse as he's
been hugged a lot!
I have added Rufus to my 
"For Sale" page.
Now, I'm off to work on another
elephant.....I love elephants!
Happy sewing!!

Friday, June 28, 2013

Tutorial--Eyes For A Stuffed Animal & The Ladder Stitch

Before I attach Penelope's head to her
body, I want to sew on her eyes.
I use glass eyes that have an attached loop,
just like the antique bears & animals.
I use a very long needle with a large eye and
 a long length of heavy waxed cord that's doubled.
 Any type of strong thread doubled will work.
Waxing your thread adds strength.

Mark where you want to place the eyes.
 My marks are down in the fur.
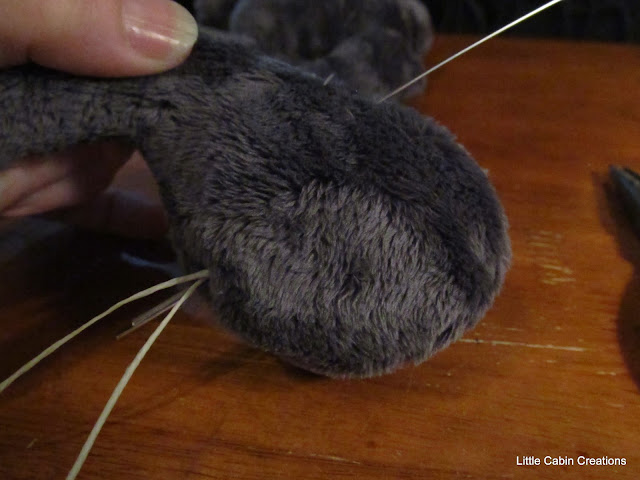
Insert the needle at the bottom on the head,
just to the edge of the joint disc.  Come out
where the mark is.

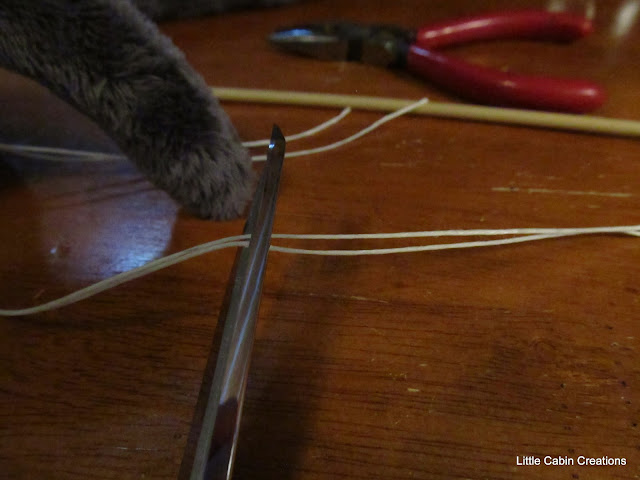
I enlarge this hole a bit with my sharp knitting
needle or wooden skewer, just enough
to allow the entire loop of the eye to go inside the head.
DON'T cut the fabric, gently spread the fibers.
If you want to change the placement of the eye, it's
easy to push the fibers back together and make
 a different hole.
Place the eye on the end of the needle and go
 back into the hole.
Come out next to the entry point.
One eye in place.

For the other eye.
Insert the same needle into the bottom of the
 head on the other side of the disc joint &
come out where the second eye is marked.
 Enlarge the hole.  Put the eye on the end of the
 needle and go back through the hole.
 
Come out next to the entry point.
Both eyes in place.

 Pull both threads, until you like the look of the eyes.
The eye on the left needs to be pulled in tighter.
Make a couple of secure knots.

 Cut the long threads.

 To hide your thread ends, re thread one double-thread,
 insert into the bottom of the head.  Come out
 any place on the head.
Pull tightly and snip the thread close to the fabric.
Do this with the other doubled thread end.
I use my needle nose pliers to help pull the thick thread.
Done.
 Attach the head to the body by finishing the joint
inside the body. (previous post)
If I am satisfied with the placement of the joints
I sew up the remaining seams of the body parts
with a ladder stitch.
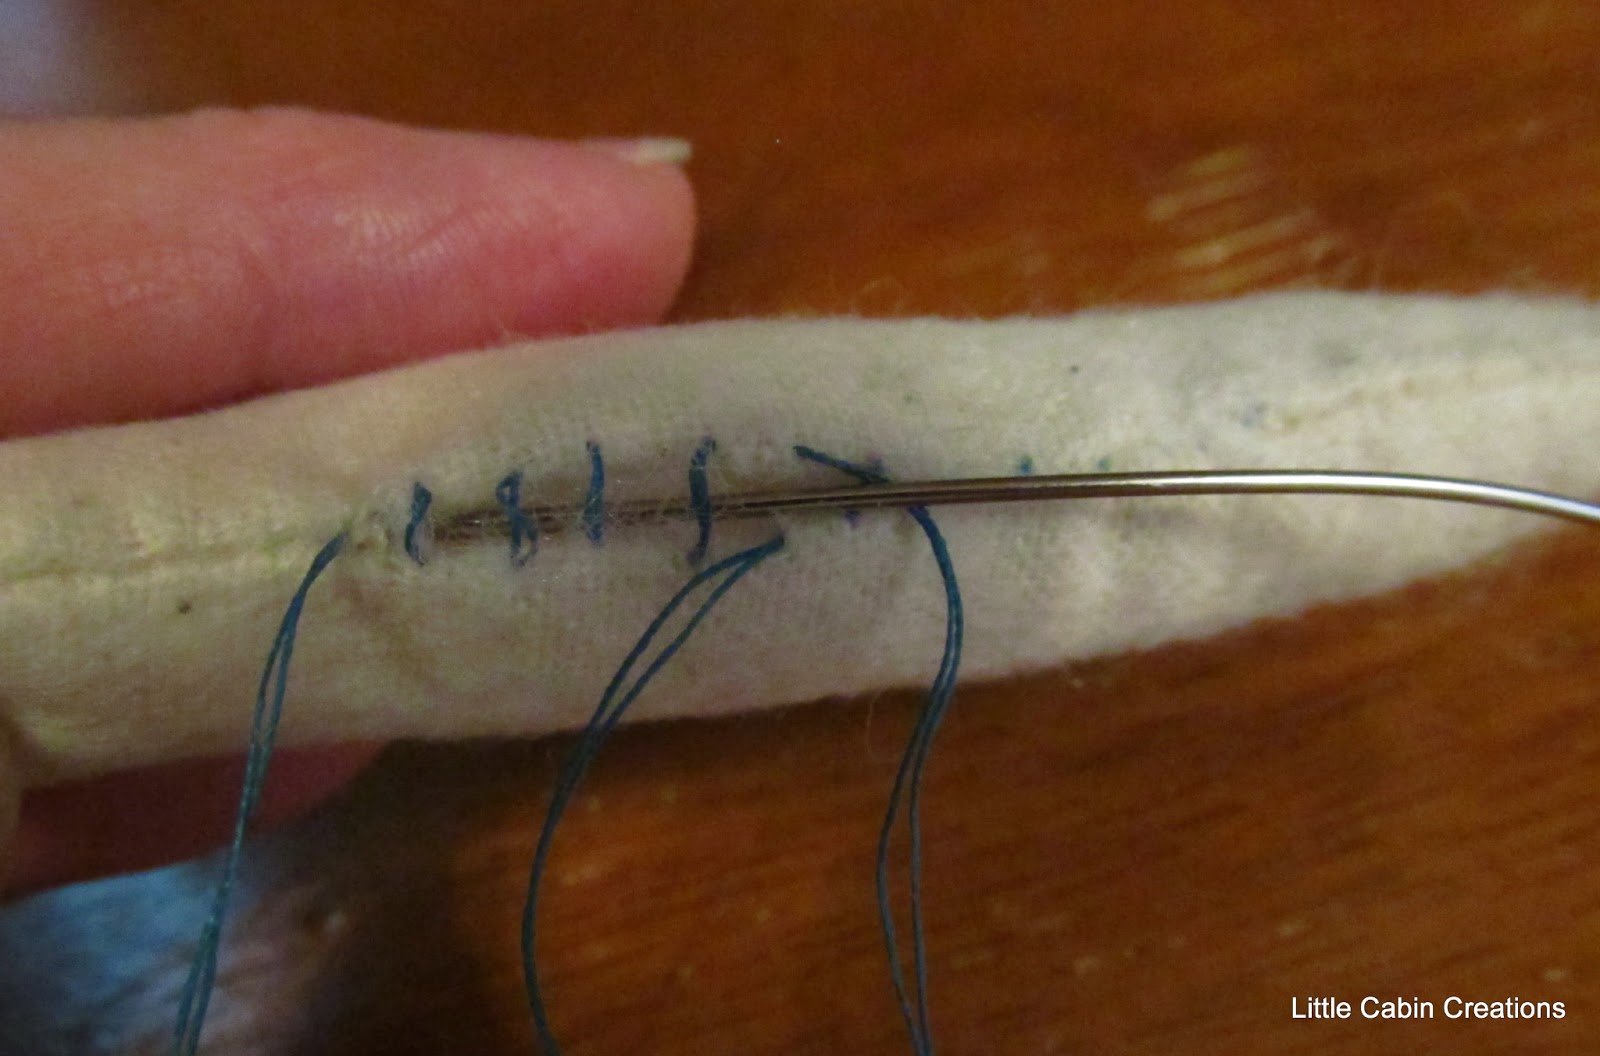
Here is the ladder stitch done on a pretend
arm made out of flannel and bright blue
thread doubled , so you can easily
see how it's done.
  I have marked the seam line in the photo below,
just for reference.
 Start at one end.  Insert the needle underneath the
 fabric, along the seam line, close to where the prior
 seam stitching ends.
 Pull it through.
 Cross over to the other side.  Insert the needle
through the top of the fabric, on the seam line.
 Move the needle down the inside fold of the seam.
Come out about 1/4 inch away, on the seam line.
 Pull the thread through, leaving a very loose stitch.
 Cross over to the other side.  Insert the needle on
 the seam line, move the needle down the inside fold
of the seam.  Come out about 1/4 inch away on the
seam line.
 Leave a loose stitch.
 
Cross over and repeat.
See how it looks like a ladder?
Continue this crossing over & moving down the
 inside of the seam,

until you get to the end.
 I use the eye end of a large needle to push the
stuffing and seam edges down and pull the fur
up, as I tighten each stitch.  Start at the beginning.
To tie off the thread, insert the needle
Wrap a couple loops around the needle.
Pull the needle through.
Stick the needle back into the fabric next to the
 knot, come out anywhere.
Pull tightly
& cut the thread.
Finished seam.
 You can also tighten your stitches as you go.
When working with bulky fur, it seems to go
smoother for me if I do that last.
On Penelope's arm, the seam is virtually
invisible after I pick out the remaining fur that
was stuck in the seam.

SEW MUCH FUN!!
Thank you ladies for your comments,
I'm glad you enjoy these lengthy silly
 tutorials of mine, but hopefully they help your
doll or animal making a bit easier.