I have finished making some pantalettes
for my latest little dolly. I wanted to use an
antique pie crust button, but didn't want to make
a buttonhole, so I opted to make a loop.
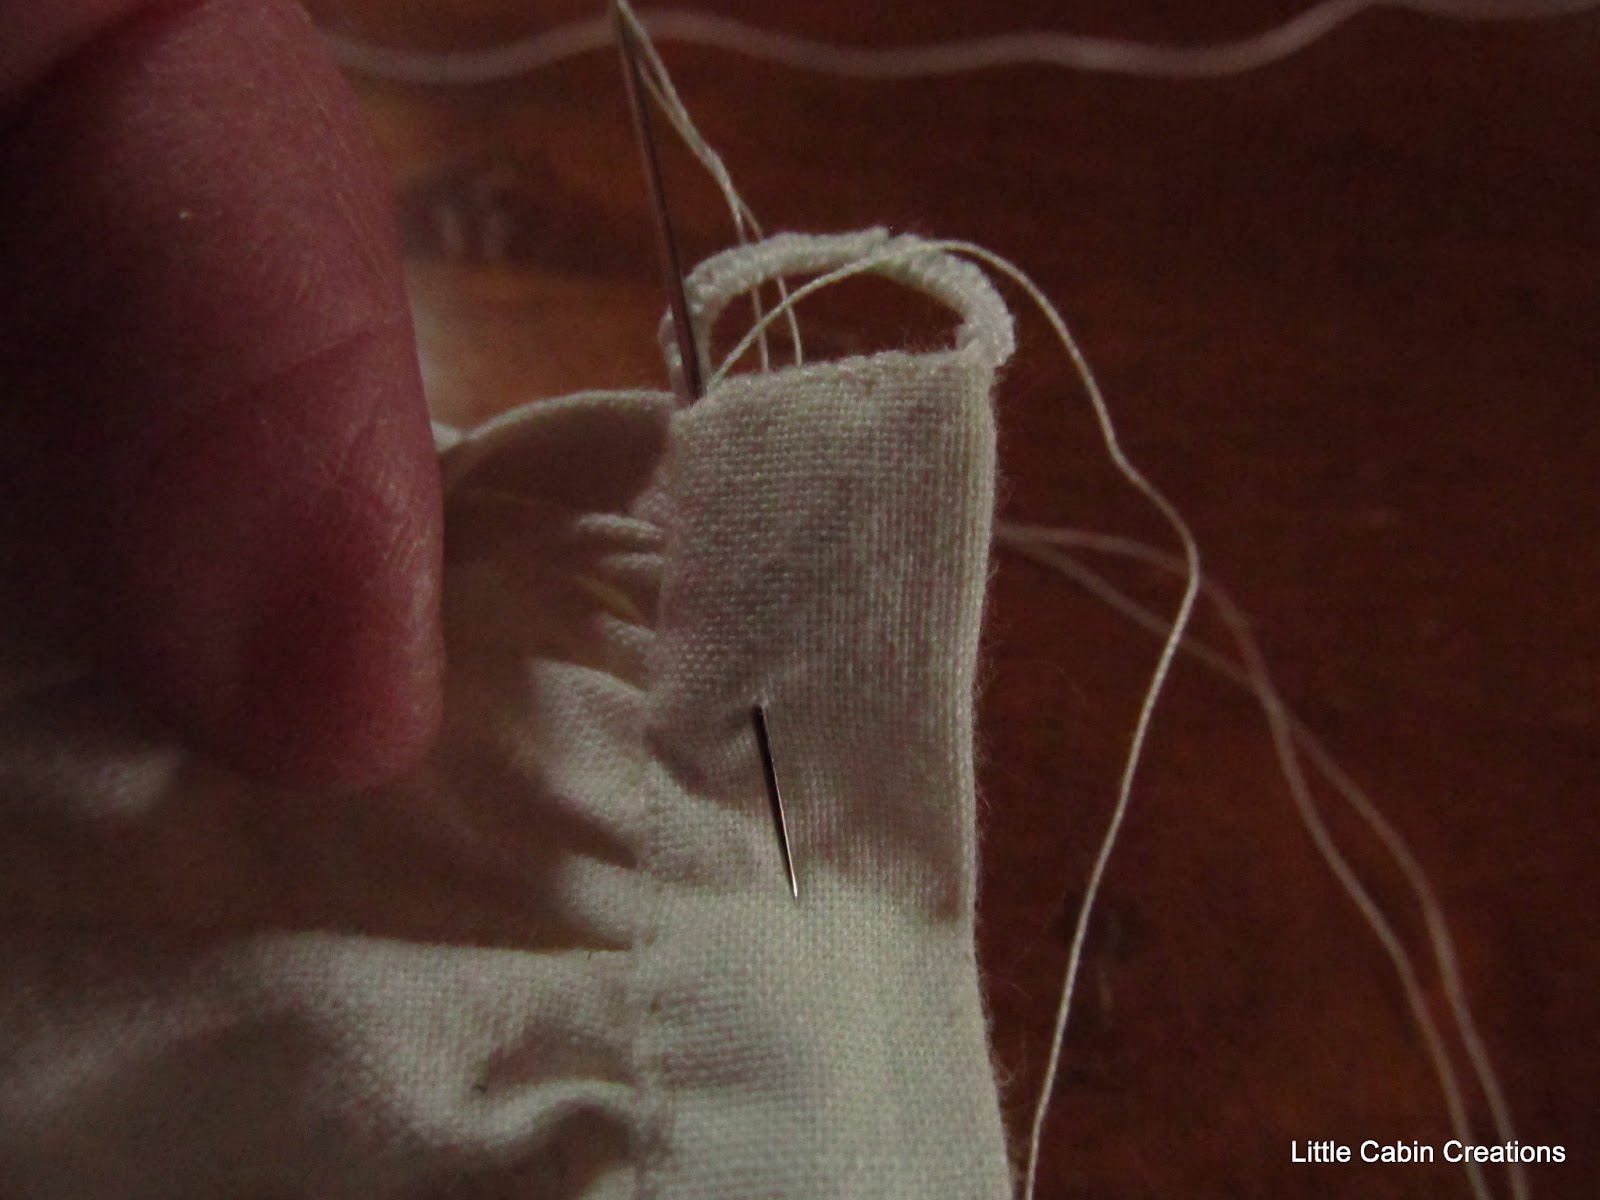
You can see below, the button side of the
waistband has been whip stitched closed.
The side that will have the buttonhole loop
has been left open. 
I have done that, because I want to hide my knot.
I use buttonhole twist thread that is heavier than regular
thread. If you don't have it, just double regular thread.
~~~~~~~~~~~~~~~~~~~~
I start by inserting my needle inside the waistband
edge, coming up at the top center fold of the waistband.
As you can see, my knot is hidden inside the waistband.
Insert the needle at the bottom of the waistband.
Come out, at the top of the waistband,
right next to the top thread.
 This makes the first loop. Repeat.
Now, there are 2 loops. Check to make sure
the loops are even and fit around the button.
Loop the thread to the left. Stick the needle
through the 2 loops and pull tightly.
This makes a small knot that looks like this.
Again, loop your thread to the left, stick the needle
through the 2 loops and pull firmly,
butting this second little
knot next to the first one.
 Continue looping the thread to the left, sticking
the needle through the 2 loops,
pulling tightly and
butting up to the last knot.
Continue looping the thread to the left, sticking
the needle through the 2 loops,
pulling tightly and
butting up to the last knot.
 Till you get to the bottom of the loop.
 Can you see the one stitch below that
I didn't pull tightly?
It makes a big difference on the back of the loop,
if your knots are not pulled securely & butted
together neatly.
Try to use the same tension on each little
"loop knot" you make.
Can you see the one stitch below that
I didn't pull tightly?
It makes a big difference on the back of the loop,
if your knots are not pulled securely & butted
together neatly.
Try to use the same tension on each little
"loop knot" you make.
 Time to secure the thread end. This can
be done by making a tiny back stitch
next to the thread end. OR
Time to secure the thread end. This can
be done by making a tiny back stitch
next to the thread end. OR
This is what I do when I have 2 layers of fabric.
Insert the needle right next to the thread.
Make a loop around the end of the needle. 
Pull securely making a tiny knot.
Insert the needle next to the knot, come out
a distance away. (Between the layers of fabric)
Snip off the end of the thread.
Leaving a only a tiny knot.

Here is my knot,
hidden inside the waistband.
Time to stitch the end of the waistband.
Using regular thread insert the needle inside
the waistband coming out on the top (knot is
hidden inside the waistband).
Whip stitch the edge together. Hide the knot.
Bring the needle out between the layers of
fabric. Snip off the thread.
Done!
How easy is that?
Happy Sewing!


 Till you get to the bottom of the loop.
 Can you see the one stitch below that
 Time to secure the thread end. This can