
Traditionally the sugar egg is decorated with
flowers made from piped royal icing.
The first time I traveled to England in the late
70's I was introduced to cakes iced with rolled
fondant and decorated with stunning flowers
made with sugar paste, also called gum paste or
pastillage. I purchased a couple of cake decorating
books while there and my love of sugar paste began.
Besides, the flowers I make from piped
royal frosting are down right horrid!
Besides, the flowers I make from piped
royal frosting are down right horrid!

Sugar paste is an edible sugar based dough
that's used like clay, it's very pliable and dries hard.
I used to make my own sugar paste from scratch,
but take a stroll down the cake decorating isle
at the local craft store and it's amazing what's
available. So, I bought mine pre made, and it
works beautifully!
~~~~~~~~~~~~~~~~
Most of these sugar paste flower cutters areavailable. So, I bought mine pre made, and it
works beautifully!
~~~~~~~~~~~~~~~~
too big for eggs, but I will use some of the
leaf cutters.

These push molds designed for sculpey clay
work great with sugar paste.
work great with sugar paste.


I have assorted pastel Wilton colors and pearl dust.

I also use:
Thin floral wire
Long floral wire 28 or 30 gauge
Floral tape
Scissors
Small wire cutters
Styrofoam
Floral tape
Scissors
Small wire cutters
Styrofoam

Ribbons

On the left side of the plate below is a chunk of sugar
paste. On the right is a dollop of Crisco shortening.
Crisco is used to prevent the sugar paste from
sticking to your fingers and it helps keep
the sugar paste from drying out.
paste. On the right is a dollop of Crisco shortening.
Crisco is used to prevent the sugar paste from
sticking to your fingers and it helps keep
the sugar paste from drying out.

I add coloring to the sugar paste sparingly and
kneed between my fingers and palms.
Try taking photos with greasy hands!
~~~~~~~~~~~~~~~~
You will notice my fingers have lots of
color under my nails, I promise my
hands are clean!
kneed between my fingers and palms.
Try taking photos with greasy hands!
~~~~~~~~~~~~~~~~
You will notice my fingers have lots of
color under my nails, I promise my
hands are clean!

Rosebuds
I colored 3 balls in 3 shades of pink to make
some rosebuds, and roses.

Sugar paste dries out incredibly fast, so I keep it
wrapped in plastic wrap I've greased with Crisco.
wrapped in plastic wrap I've greased with Crisco.

I cut my wire into pieces about 4 inches long.
I am making lots of flowers and some
may be used for another project, so I want the
extra length. All you really need for eggs is about
2 inches of wire.
extra length. All you really need for eggs is about
2 inches of wire.

I make a little hook on the end with my wire cutters.

To make a rose bud, I start with a small cone of
the darkest shade of pink.
the darkest shade of pink.

Insert it on the wire and smooth out the
bottom by twisting the wire and gently pulling
down the paste. It makes a little spiral.

I make a ball from the medium shade of pink.

I flatten this out between my fingers.
I don't worry about making a perfect
shape, each petal of a flower is slightly
different in nature.
I don't worry about making a perfect
shape, each petal of a flower is slightly
different in nature.

Then wrap it around the cone.

With the tip of my finger I roll the edges
of this petal down.

Then I make a ball out of the lightest shade of pink.

Flatten it out. Sugar paste is very pliable and
you can make it paper thin.
you can make it paper thin.

Wrap this around the bud by placing the middle of
this petal so it covers the spot where the previous
petal ended. Basically, overlap the prior petal.

I gently squeeze the bottom layers together.

I roll down the edge of this petal too.

I cut off the bottom section.

Then shape the bottom of the bud.

How easy is that?

Several rosebuds drying.

Roses
I start with a center cone & one petal in
the darkest shade of pink.
the darkest shade of pink.

Next is 3 balls of the medium shade.
Make them similar in size but not
exactly the same.
Make them similar in size but not
exactly the same.

Flattened into 3 petals.

Add the first petal overlapping the prior petal.

I try to gently pinch the bottom together
after I add each petal.

I then add the second petal overlapping the prior one.


It looks like this.

Then I add the third petal and gently roll the
edges down giving shape to the petals.

Again pinching the bottom.

The last row has 5 petals of the lightest shade.
Make these balls a little larger than the previous
balls but, not exactly the same.
Make these balls a little larger than the previous
balls but, not exactly the same.

I add each petal overlapping the prior one
just like the previous row.
just like the previous row.

1st petal

2nd petal

3rd petal

4th petal

5th petal

All 5 petals

Roll down and shape the petals.


Remove the wire.

I cut the bottom flat with scissors.

I set my roses on a piece of foam to dry.

Not a single perfect rose in the bunch, but
aren't they pretty anyway!

to paint the petals.


like bright colors, frilly ribbons and bling, so I
will use this on all the flowers and leaves.
I prefer the softer version. Sugar paste can
make the thinnest petals and they
have a translucent look to them. Lovely
and delicate.

pink and yellow stains!
~~~~~~~~~~~~~
All my flowers from the push molds are
made the same way.
The photos are self explanatory.
I use this little wooden sculpey tool
to press the paste into the
mold.

Daisies


Really, how easy is that!
Lots of daisies.

Lots of little daisies.


Leaves are made slightly different.
I roll out the sugar paste with a small
rolling pin on a lightly greased board.
Sometimes I actually cut a leaf shape
out with scissors, that works fine too.


my finger.

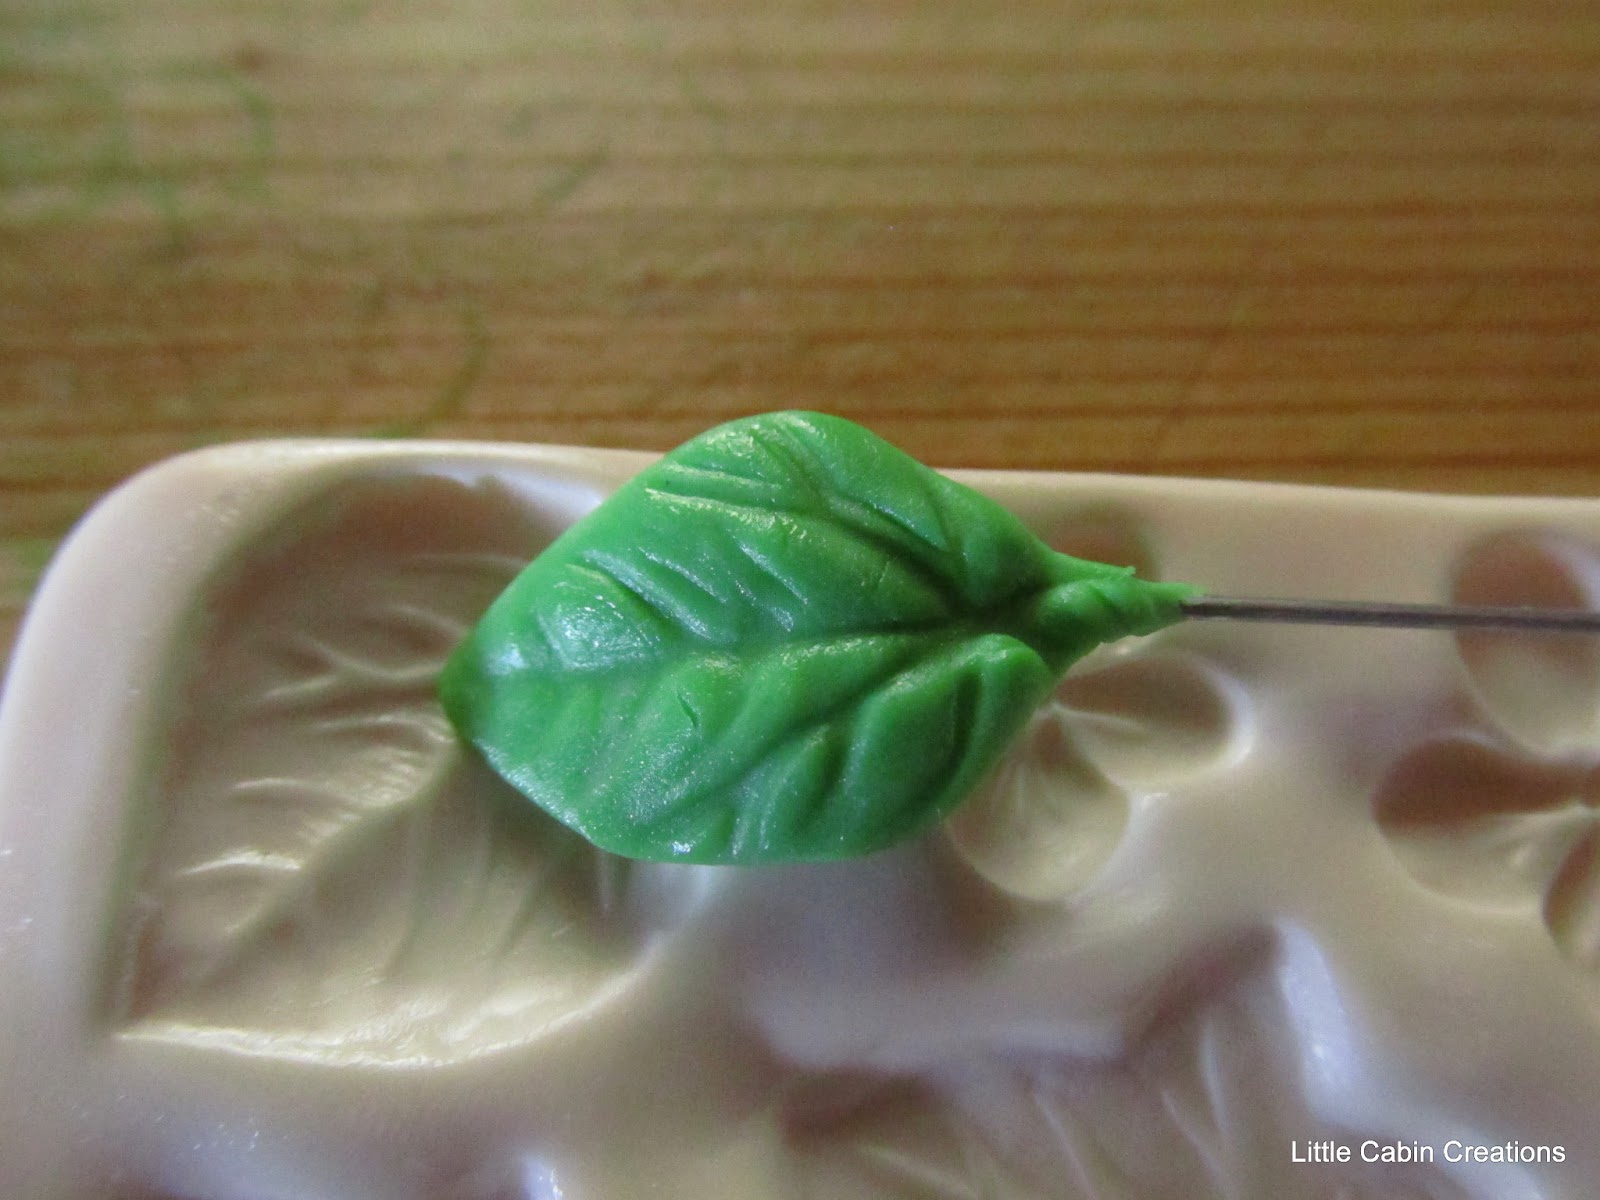

These little flowers and leaves are so
simple and easy to make!
~~~~~~~~~~~~~~~~~~~~
Along the way I made tiny eggs with the
leftover bits.


I use floral tape to wrap the sprays of ribbon.

Cut a length of tape, stretch it to activate the
stickiness. Kind of like a flea collar.


floral tape. Most of this will never show,
but if it does, I'd rather see green than
bare wire.


I'm very proud that my photos look like
I am so neat and orderly. In reality
my dining room table looked like this
for about 10 days!

put me in a Spring mood!
Wow. Beautiful flowers and leaves and ribbons. I am so amazed at how you made this. The eggs are going to be stunning.
ReplyDeleteWhat a wonderful tutorial.........thank you! So very beautiful! It all is so cheery and colorful!
ReplyDeleteSurely you must have a team of magical fairyland elves helping you...love your tiny Gumpaste flowers!
ReplyDelete