
Cora's hand sewn chemise is finished.
It's made with flat felled seams and
underarm gussets.
I though I'd show how it's done.
Sewing with flat felled seams isn't
hard. It just has to be done in the
right order! I usually eyeball my seams
but, I'll have some measurement
for your convenience. Frankly, I do
very little measuring & don't
use patterns, just basic shapes.
This ended up with lots of white
photos, I hope it's not
too boring!

for more room in the bosom and underarm
area. Cora's a pancake doll, she doesn't
have any boobs but she wants a
period chemise!

These are the pieces needed to
make Cora's chemise.

Cut a long strip if cotton.

Fold it down with the raw edges
at the bottom. Allow enough length
for the hem.

Fold toward the right.

Center it on the front.
The folded edges are on the top and
center. I adjusted the width to fit her.
You can see from the photo of
Cora that her chemise has drop
shoulders.
The folded edges are on the top and
center. I adjusted the width to fit her.
You can see from the photo of
Cora that her chemise has drop
shoulders.

Cut a semi circle.
You can make this a square, or more
of a rounded neckline depending on
the style you choose. The same process
below will work for any neckline.
Start small, you can always make it
of a rounded neckline depending on
the style you choose. The same process
below will work for any neckline.
Start small, you can always make it
bigger. We will be putting a facing on
this neck so allow for a small seam.

Cut the remaining shape
of the body, this is how
mine turned out.
mine turned out.

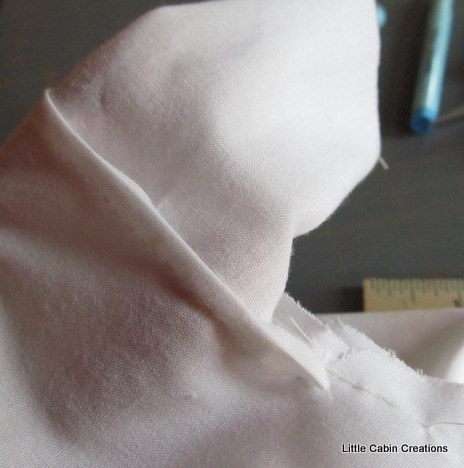
Fold it out, and try it on the doll.

This "just" fits over the dolls head,
so with a seam allowance for the
facing it should be just right.
I'm not sure where I want the hem
to be, so I'll leave it long. I can
always trim it off later.

While you have the chemise on the doll,
mark the spot for the bottom of the sleeve.

Mark the sleeve spot on the opposite
side and on both sides of the back.

I found the rectangle size needed for
the sleeve by cutting it 3/8 wider ( that's
going to be the seam allowance) on
each side of the 2 sleeve marks.
This is the long part of my rectangle.
You can barely see the little blue
marks at the bottom of the photo.
The short part of the rectangle is the
sleeve length plus enough for the hem.
Traditionally the sleeve length was to
the elbow and didn't have a cuff.

Cut two 1 1/2 in squares.
Iron into triangles.

For the facing cut a strip on the bias
(That means it will stretch when
pulled length wise) long enough to fit
around the entire neckline.
Make it long enough, you can always
trim it off.
My strip is about 5/8 wide. Iron
each long side toward the center
making a channel.
These folds will be my stitching and
folding lines later.

Start with the neck first.

Pin the facing to the RIGHT side of the neck hole.
Cut off the 2 long ends and sew them
Cut off the 2 long ends and sew them
together.

It will look like this.
Notice how my pins are pushed
down and the pin ends are stuck
to the inside. That's so my thread
doesn't get tangled in them when I
sew........I hate that! Thread slips off
a round glass head pin fairly easily.
Ready to sew?
Do you have your beeswax handy?
Do you have on a thimble?
Here is a " Make Do" thimble
for light weight fabrics.
 Cut an oval disc from a plastic milk
carton...............
 to fit the end of the middle
finger of your sewing hand.
 Use a fabric band aid to secure it
to your finger.
It's cheap.
It's reusable.
It's comfortable.
It won't fall off.
&
It protects your finger!
Here's a link to a previous post
about hand sewing stitches and
how to do them.
http://littlecabincreations.blogspot.com/2012/05/hand-sewing-tips.html
Start sewing.
Notice how my pins are pushed
down and the pin ends are stuck
to the inside. That's so my thread
doesn't get tangled in them when I
sew........I hate that! Thread slips off
a round glass head pin fairly easily.
Ready to sew?
Do you have your beeswax handy?
Do you have on a thimble?
Here is a " Make Do" thimble
for light weight fabrics.

carton...............

finger of your sewing hand.

to your finger.
It's cheap.
It's reusable.
It's comfortable.
It won't fall off.
&
It protects your finger!
Here's a link to a previous post
about hand sewing stitches and
how to do them.
http://littlecabincreations.blogspot.com/2012/05/hand-sewing-tips.html
Start sewing.

Sew with a back stitch all the way around
the neckline. Use the top fold as your
stitching line.
stitching line.

Trim off the inside layers all the way around.

Fold up the outside layer of fabric.

Trim this edge too if needed.

Fold toward the inside, and down.

Pin and whip stitch all the way around,
easing around your corners if you have any.

Done!

Wasn't it nice to have fold lines!
FROM HERE ON OUT ALL STITCHING
IS DONE WITH A BACK STITCH
(with the exception of the hems)
&
(with the exception of the hems)
&
ALL SEAMS ALLOWANCES WILL BE
3/8 INCH WIDE.
ALL SEAMS WILL BE FLAT FELLED.
I like to have enough fabric to
I like to have enough fabric to
hold on to, so we will be trimming some.
This is tiny work and I have a touch of
arthritis, it's very frustrating
arthritis, it's very frustrating
when I don't have enough fabric to
grab. I have a very sharp small
pair of scissors. You are welcome
to work with smaller seam allowances.
 This is what the top of the back stitch
looks like.

Put a pin in the right side
of your chemise at the front of
the finished neckline. We will
refer back to this later.
grab. I have a very sharp small
pair of scissors. You are welcome
to work with smaller seam allowances.

looks like.

This is what the back looks like.
Its very similar to the stem stitch.
Its very similar to the stem stitch.
BIG DIFFERENCE
I will be specific about which side
of a seam will have the top of your
back stitch. Seams that are felled
need the top of the stitch UP.
On with the first sleeve.Put a pin in the right side
of your chemise at the front of
the finished neckline. We will
refer back to this later.

Lay your chemise body right side up.
Front of chemise is on the right, note
the pin up by the neckline.
Front of chemise is on the right, note
the pin up by the neckline.
Lay you sleeve rectangle (long side)
next to the body edge. Right sides are
up. I have drawn a line on
the shoulder of the body as a sewing guide.
the shoulder of the body as a sewing guide.

Pin together. Raw edges of the seam
are looking right at you!
This seam is going to be felled and that's
done on the right side of your chemise.
Only sew on the line, leaving the ends
unsewn. We are actually just attaching
the middle section of the sleeve to the
center of the shoulder.
are looking right at you!
This seam is going to be felled and that's
done on the right side of your chemise.
Only sew on the line, leaving the ends
unsewn. We are actually just attaching
the middle section of the sleeve to the
center of the shoulder.
Start on the right using a back stitch
and sew the seam.
and sew the seam.
Sew from the TOP side.

Here's your shoulder seam, back side
of stitching is facing you.

Flip it over onto the body.

Pin a gusset to the lower left hand corner.
Note the direction of the ironed crease.
Sew the gusset on, from the other side.

Back side of stitching is facing you.
Note the blue line on the top of the
gusset.

Note the blue line way to the right
bottom corner of the sleeve. Those blue
lines are your stitching lines.
bottom corner of the sleeve. Those blue
lines are your stitching lines.

Move the gusset over and match
up the blue lines.

Pin together and sew on the side
you are looking at.

Back of the stitch on your left,
top of stitch on the right side. You
can faintly see the ironed crease
on the gusset. Make sure one pointed
end has 2 sewn sides and the other
pointed end has 2 raw edges.
can faintly see the ironed crease
on the gusset. Make sure one pointed
end has 2 sewn sides and the other
pointed end has 2 raw edges.

Now we are going to finish stitching
the bottom sleeve seam.
the bottom sleeve seam.
Start by inserting your needle in
the very corner of your gusset just
where the 2 sewn lines meet at the corner,
where the 2 sewn lines meet at the corner,
( We are joining the 2 sides of the sleeve
and lining up with stitching that
is already there).
and lining up with stitching that
is already there).

Bring your needle all the way through
onto the side that has the back of the
stitching showing.
onto the side that has the back of the
stitching showing.

Go over 1 stitch. Go back through.

You will come out on the other side of the
sleeve along the other stitching line.
Notice it's the top of the back stitch.
sleeve along the other stitching line.
Notice it's the top of the back stitch.

Pin and continue your seam to the end.
Sewing over the few stitches that are
already there.
That entire seam now has the top of
Sewing over the few stitches that are
already there.
That entire seam now has the top of
the back stitch on it.

This is what it looks like so far.

Turn your sleeve, to the side of the seam
that has the back of the stitching
facing you.
facing you.

Trim off the first layer of that seam,
all the way across.
all the way across.

Trim the section of gusset that has
the back of the stitch showing, as above.

Clip the edge of the gusset that has the
top of the stitch facing you, at the
corner almost to the stitching line.
Careful, don't cut through the
seam!
top of the stitch facing you, at the
corner almost to the stitching line.
Careful, don't cut through the
seam!

Trim and fold under. Don't trim too
much this is going to be the feld seam.
Leave enough to sew through. Back
stitch on the folded edge of this little seam
starting on the gusset inside corner.
I call this felding the seam.
My feld seam is about 1/4 inch wide,
quite large in Dolly world. Make yours
smaller if you wish. Try to make
all the rest of your felds this same width.

Doesn't that look nice.

Trim and fold the remaining seam edge over
the inner seam you trimmed all the way
across.

This is ready to feld.
It's best to iron your folded edge
to get a nice flat feld.

I sew right to left so I started at
the gusset end.

Ease over the end of the prior felled seam.
Make sure it's covered securely!

Sew to the end of the sleeve.
Your gusset is half done and your
sleeve seam is done.

Now we are going to attach the 2
remaining sides of the gusset to the
body of the chemise and sew back up to
the ends of the shoulder seam you
started at the very beginning.
Notice I have marked the stitching
line on the front all the way
to the bottom of the chemise.
remaining sides of the gusset to the
body of the chemise and sew back up to
the ends of the shoulder seam you
started at the very beginning.
Notice I have marked the stitching
line on the front all the way
to the bottom of the chemise.

Start on the side that will attach to the
front of your chemise. See the pin
up by the neckline? Pin from the end
of the shoulder seam down to the
end of the gusset and STOP.

Start sewing at the end of the shoulder
seam and sew to the end of
the gusset and STOP.

Top of the back stitch is on the top
of the shoulder seam.

Back of stitching is on the top of the
little felled seam and stops at the
end of the gusset.

Now we are going to attach the other side
of the gusset to the back side of the body.

I have pinned and marked the stitching
line from the shoulder seam to the
end of the gusset. Start at the end of the
shoulder seam and sew to the end of the
gusset and STOP. Sew on the top side.
just like you did on the other side.

The back side of the stitch crosses
the longer feld.

Clip the corner of the inside of this seam
to the stitching line. Careful, don't cut
through the seam!
through the seam!

Trim this layer. Notice the lower layer is
NOT clipped.

Trim all the way over the shoulder.

Stopping at the end of the gusset.

Now, clip the corner the outer layer just
to the stitching line.
to the stitching line.
Careful, don't cut through the seam!

This is what it looks like on the other side.

Trim this layer all the way to where
you stopped previously.
This is going to be folded over and
felled, don't trim too much off!
This is going to be folded over and
felled, don't trim too much off!

Photo shows the clipped corners and
trimming.
trimming.

Time to attach the lower section of the
gusset to the front and back of the body.
Insert your needle into the corner of gusset.
Come out on the FRONT side of the chemise.

You will come out on the stitching line.
Be sure to line up the edges of the front
and back of the chemise evenly. Take a
couple of secure stitches.
Be sure to line up the edges of the front
and back of the chemise evenly. Take a
couple of secure stitches.

You can see the 3 or 4 stitches I have
sewn over. Stitch all the way
to the bottom of the chemise.
Continue clipping the seam edges to the
bottom of the chemise.
to the bottom of the chemise.
Continue clipping the seam edges to the
bottom of the chemise.
Fold over the outside trimmed seam and iron.

Pin, starting at the gusset corner.

Continue over the shoulder to the bottom
of the chemise. Hide your pin
ends to prevent tangling while you sew.

Feld this seam starting at the gusset corner
using your back stitch. Sewing right to left.
Go up over the shoulder, ease over the end of
the prior felled seams. Make sure they are
covered securely.
the prior felled seams. Make sure they are
covered securely.
Are you waxing your thread to
prevent those very frustrating
tangles?

Cora's teeny tiny totally
useless gusset is done.

Continue your feld to the end of the chemise.
This side is DONE.
Hop on over to the other side &
do the whole thing again!!!!
To be technically correct in you sewing
you should mirror your sides.
If you choose to do this, at the
point where you first attach your
other gusset.................instead of
pinning it to the lower left corner,
pin it to the lower right corner and
basically do everything backwards.
OH MY!!!!!
THAT SHOULD REALLY
CONFUSE YOU!!!
Personally, I don't think it makes
that much difference. Cora's is
not mirrored. I still had a couple
photos to take so I did both sides
the same.
Once you do this a couple of times,
Once you do this a couple of times,
mirroring will be easy. For now, do
it just the same. The sewing police
will not come after you!
Trim the bottom of the chemise
and sleeves if needed.
Turn under the raw edges and hem.
YOU ARE DONE!!!


Cora's period chemise is
ready to lightly age.
Waxing your tread can interfere with
the aging process so I used off white
thread even though it doesn't show in
the photos.
If you actually made it this far.........&
have a better understanding of how
to feld seams and haven't pulled your
hair out.........
I have a little log cabin mold I poured
with pure beeswax just the right size
for waxing your thread.

Leave a little comment & on July 4th I'll
put your names in a hat & choose one.
I'll send that person one for their sewing basket.
Happy Sewing!!